Previous Next Sheriff CSM™
Example: Configuring High Availability for Sheriff CSM Standard Servers
This topic provides an example of how to configure two Sheriff CSM Standard Servers in a high availability environment. This configuration uses the following IP addresses:- Master: 192.168.7.235 (MasterCSM)
- Slave: 192.168.7.254 (SlaveCSM)
- Virtual IP: 192.168.7.236
-
If not already done, deploy the Sheriff CSM Standard Server according to the instructions in Sheriff CSM Deployments.
-
Change the root user password in both CSMs, as described in Reset Password for the Root User, making sure that the password is the same in each.
-
Configure the hostname in the master (primary) CSM:
- On the Sheriff Setup Main menu, go to System Preferences > Configure Hostname.
- Enter the hostname for the primary component:
MasterCSM
- Press Enter (<OK>).
-
Configure the hostname in the slave (secondary) CSM:
- Go to System Preferences > Configure Hostname.
- Enter the hostname for the secondary component:.
SlaveCSM
- Press Enter (<OK>).
-
Configure each failover pair to communicate and synchronize with its respective NTP server.
See High Availability Prerequisites and Restrictions and Configure Synchronization with an NTP Server.
-
Restart both CSMs.
-
On the secondary (slave) CSM, launch the Sheriff console.
-
On the Sheriff Setup Main menu, choose Jailbreak System
-
When you see the command line prompt, edit the file
/etc/vigilante/vigilante_setup.confas below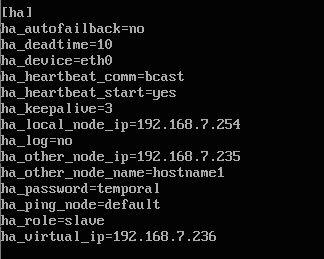
-
Save the changes.
-
Enable HA in the secondary node by entering:
screen sheriff-ha-assistant -e
Note: Use screen to keep the process running in the background even when the session disconnects.
-
Check that the secondary node is up and running:
sheriff-ha-assistant –s
-
When prompted, enter the root user password for the primary (master) server.
After about five minutes, you see output, showing HA status for the secondary (slave) heartbeat status should be Running.
-
On the primary (master) CSM, log into the Sheriff console.
-
On the Sheriff Setup Main menu, choose Jailbreak System.
-
Edit the
/etc/vigilante/vigilante_setup.conffile as below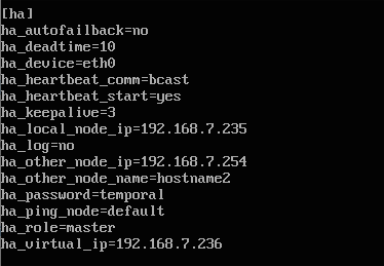
- Save the changes.
-
Enable HA in the primary node: screen sheriff-ha-assistant -e
Note: Use screen to keep the process running in the background even when the session disconnects.
-
Verify that the primary node is up and running:
sheriff-ha-assistant –s -
When prompted, enter the root user password for the secondary server.
After about five minutes, you see output, showing HA status for the secondary (slave) heartbeat status as Running.
-
Launch a web browser, check that you can access the Sheriff CSM Standard Server through the
ha_virtual_ipassigned in thevigilante_setup.conffile.It should look like the following:

