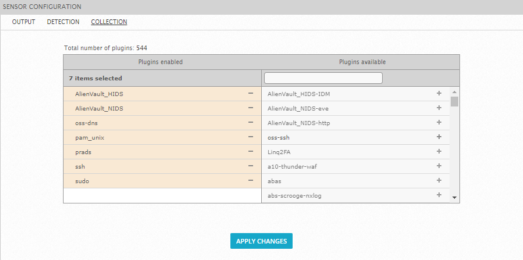
Previous Next Sheriff CSM™ Enable Plugins from the Sensor (Deputy) Configuration You can enable up to 100 plugins on a Sheriff CSM Sensor from the Sheriff CSM web UI or from the Sheriff Console.
-
In the Sheriff CSM web UI, go to Configuration > Deployment > Components > Sheriff Center.
-
Click one of the Sheriff CSM Sensors.
-
Click Senor Configuration > Collection. The left column of the Sensor Configuration page shows the enabled plugins. The right column shows the plugins available for enablement.
-
Move a plugin from one side to the other in either of these ways: Drag a plugin from one column to the other. Use the links [+] or [-] next to a specific item.
-
Click Apply Changes .
-
Configure
For instructions, see Configure the Sheriff CSM Sensor to Receive Logs Through Syslog.rsyslogandlogrotate.
-
Connect to the Sheriff Console through SSH and use your credentials to log in.
The Sheriff Setup menu displays.
-
Select Configure Sensor.
-
Select Configure Data Source Plugins.
-
Use the keyboard arrow keys to move to the plugin, select the plugin by pressing the spacebar, and then press Enter (<OK>).
-
Press <Back> until you are on the Sheriff Setup menu again. Select Apply all Changes.
-
Press <Yes> to confirm.
Sheriff CSM applies the changes and restarts all the services, which may take several minutes.
-
Configure
rsyslogandlogrotate.For instructions, see Configure the Sheriff CSM Deputy to Receive Logs Through Syslog.
/etc/vigilante/agent/config.cfg. The new plugin will appear inside the [plugins] section. 


