You are here: Docs>Sheriff Web>UserGuides>SheriffCSMDocumentation>UserGuide>VulnerabilityAssessment>VulnerabilityScanProfiles>CreatingACustomScanProfile (26 Apr 2022, SheriffCyberSecurity)Edit Attach
Up
Previous Next Sheriff CSM™
Previous Next Sheriff CSM™
Creating a Custom Scan Profile
You can create a custom profile and tailor it to the type of the target system you are scanning. To create a custom profile for vulnerability scans- Go to Environment > Vulnerabilities > Overview.
-
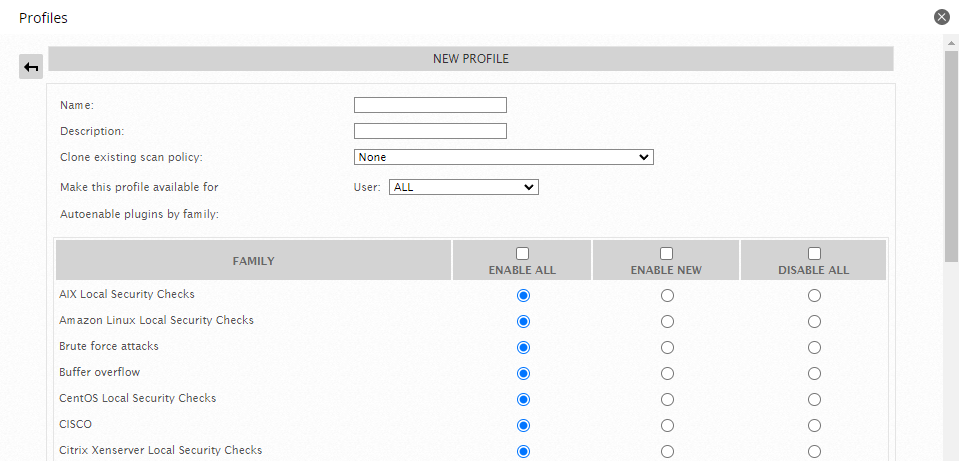
Click Profiles, and then click Create New Profile.
-
Fill in the following details:
- Name — The name for your scan profile. You will use it later to select from drop-down menus during vulnerability scan setup.
- Description — The description of the scan profile.
- Clone existing scan policy — Allows you to select another existing profile to use as a template for the new profile.
- Make this profile available for — Designate who will have access to the profile. You can select a single user, allow all users to access it, or select an organizational entity to allow access to all users within that entity to access the profile.
- Autoenable plugins option — Select whether to group the plugins by category or family. Enabling plugins by category allows Sheriff CSM to use all plugins that belong to certain categories of vulnerabilities. Enabling plugins by family narrows the selection of plugins to match relevant operating systems.
-
Enable or disable the plugins as needed with the Enable All or Disable All options. Currently, the Enable New, Disable New, and Intelligent options have no designated functionality in Sheriff CSM.
-
Click Create when you're finished creating the profile.
Sheriff CSM displays "Update Status" at the top of the page.
After it finishes creating the new profile, the vulnerabilities overview page displays.
- Click Profiles to see the created profile.
Edit | Attach | Print version | History: r9 < r8 < r7 < r6 | Backlinks | View wiki text | Edit wiki text | More topic actions
Topic revision: r9 - 26 Apr 2022, SheriffCyberSecurity
Copyright 2020 Sheriff Cyber Security, LLC. All rights reserved.