Previous Next Sheriff CSM™
Tutorial: Create a Policy to Send Emails Triggered by Events
For certain important events, you may want a notification to be sent to you or your team to inform them immediately. This process describes how to create the policies that enable these notices.Create an Action to Send Email
The following procedure shows how to create the action to send an email as a result of your policy. For the emails to be sent successfully, you must also be sure to set up the mail relay server. For further information, see Configure Mail Relay in Sheriff CSM. To create an action to send an email-
Go to Configuration > Threat Intelligence, and click the ACTIONS tab.
-
Click New.
-
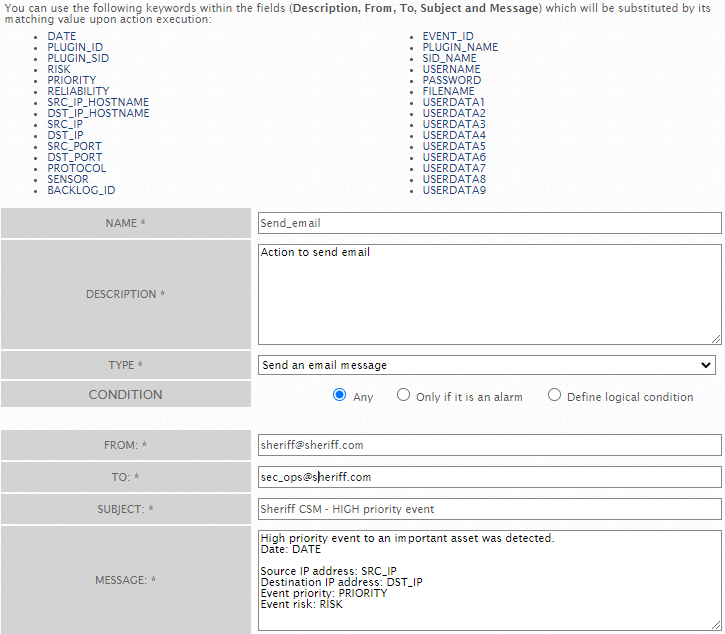
Fill out all of the required fields. In the TYPE field, select Send an email message.
-
To send the message to multiple recipients, enter their email addresses in the TO field, separated with a semi-colon(;).
-
Click Save to save your changes when finished.

Create Conditions to Trigger an Email
This procedure configures the conditions for when certain external events target a specific server in your network. To create policy conditions for external events-
Go to Configuration > Threat Intelligence > Policy > Default Policy Group and select New.
-
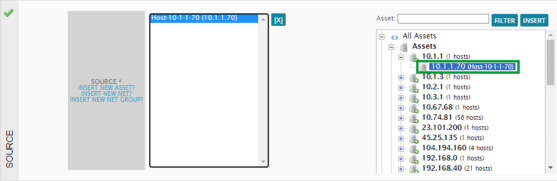
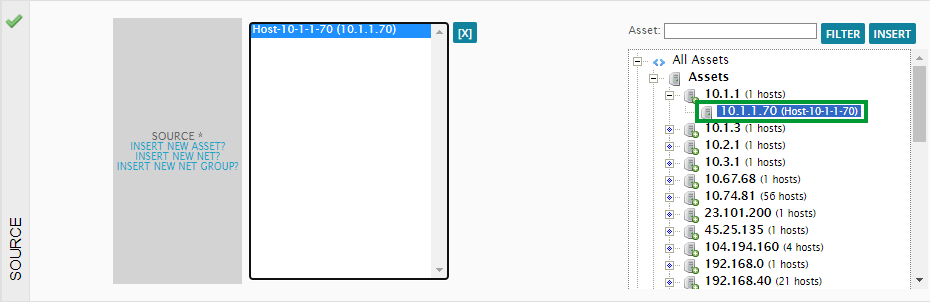
From the Policy Conditions section, choose your source.
-
Select the IP address of the critical server as asset for the destination policy condition.
In this example, we are using 172.16.0.1.
-
Click Add More Conditions, and select Reputation as a policy condition.
-
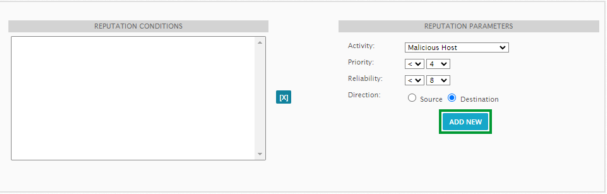
Change the Reputation Parameters values as follows:
- Activity — Select Malicious Host.
- Priority — Select > 4.
- Reliability — Select > 8.
- Direction — Select Destination, because you want to detect any attacks on the server whose IP address you used as a Destination condition.
-
Click Add New
You can now see both the Destination and Reputation in the upper part of the page.

Assign the Action as a Consequence
This procedure shows how to link the action to send the email as a consequence. To create a consequence consisting of an action-
Go to Configuration > Threat Intelligence > Policy.
-
Select the desired policy rule and click the Modify button.
-
Scroll down the page and expand the Policy Consequences section.
-
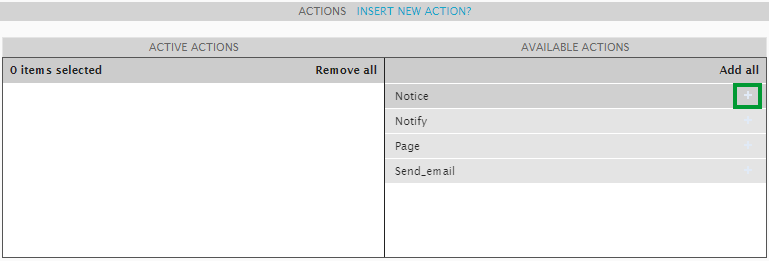
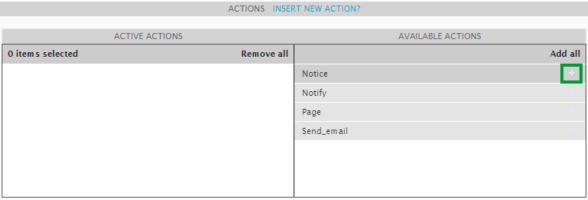
In the Actions section, select which action you want to assign from the Available Actions section on the right.
-
Add it by clicking the plus (+) sign, or by dragging it to the Active Actions section.
-
Click the Update Policy button to save your changes and exit the policy modify page.
-
Click the Reload Policies button on the main policies page to refresh and display the changes.

-
Move the policy to a desired position on the list. See Policy Order and Grouping for details.