Previous Next Sheriff CSM™ System Settings for Authenticated Scans An authenticated scan is a vulnerability testing measure performed from the vantage of a logged-in user. The quality and depth of an authenticated scan depends on the privileges granted to the authenticated user account. The following are the recommended system settings for creating a designated account for authenticated scans. Asset Scan Credentials and Escalation Options
| Operating System | Methods and Credentials | Escalation |
|---|---|---|
| Windows | Windows username and password through Server Message Block (SMB) | None |
| Linux | SSH password or public key authentication | sudo or su |
Windows
General System Configurations Overview| Windows Configurations | Settings |
|---|---|
| General System Configurations |
|
| Group Configurations |
|
| Policy Configurations |
|
Creating a Windows Admin Account
Sheriff recommends that the Admin create a designated administrator account solely for the authenticated scans rather than using an established administrator account or a guest account. Create the Windows account using the name AV Authenticated Account and a secure password. The account configuration must be set to Classic: local users authenticate as themselves. For more information about creating credentials for authenticated scans in Sheriff CSM, see Creating Credentials for Vulnerability Scans.Creating a Security Group
To create a security group-
Log in to the Active Directory on the Domain Controller.
-
Go to Start > Programs > Administrative Tools > Active Directory Users and Computers.
-
Click Select Action > New > Group to create a new security group.
-
Name the group Sheriff Authenticated Scan.
-
For Group scope select Global scope.
-
For Group type select Security.
-
Click OK to add the group.

-
Add the account that you will be using for the authenticated scans to the Sheriff Authenticated Scan group.

-
Click Start > All Programs > Accessories > Run and type
gpmc.mscin the text box to open the Group Policy Management Console. -
In the Group Policy Management window, right-click Group Policy Objects and select New.
-
Name the policy Sheriff Security Rights and click OK.

-
In the Group Policy Management Editor, click the Sheriff Security Rights policy to open the policy in the right panel. Click on the Scope tab, and then in the Security Filtering section, click Add to insert the group. In the Enter the object name to select field, add the Sheriff Authenticated Scan group to the policy and click OK.

Configuring Policies
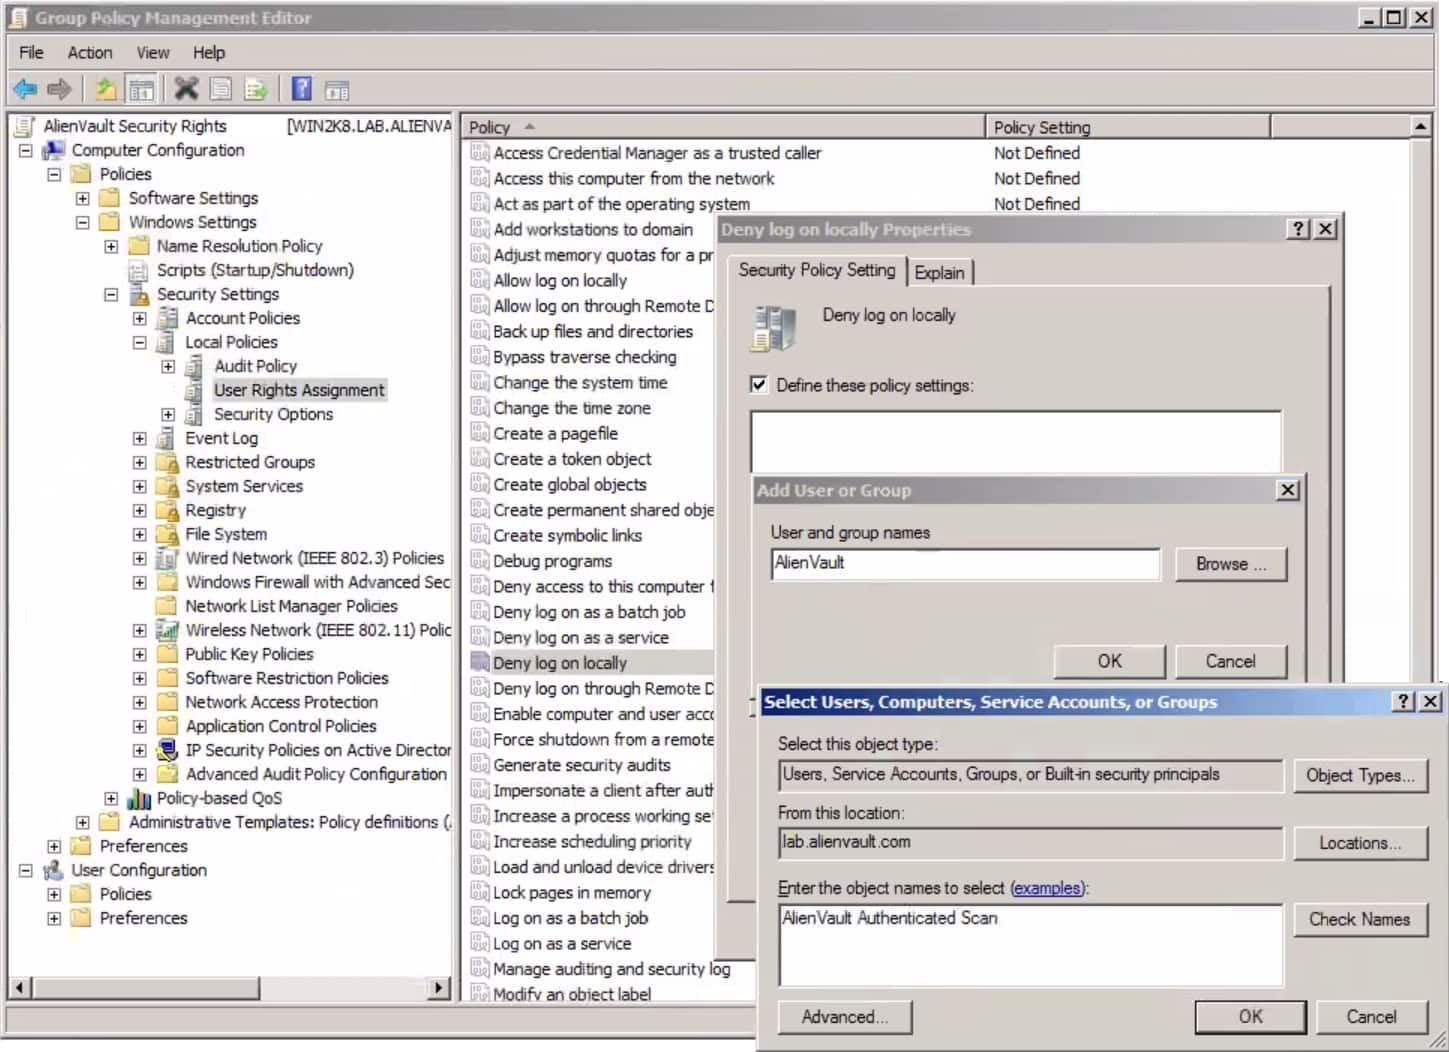
The following configurations are optional steps you can take in the Group Policy Management Editor to remove unnecessary user rights. These steps are not required for running the authenticated scans, but they do provide extra measures of internal security. To deny local logins-
Right-click on the Sheriff Security Rights policy and select Edit.
-
In User Rights Assignment, double-click Deny log on locally.
-
Click on Add User or Group.
-
Click Browse, enter Sheriff Authenticated Scan, and click Check Names.
-
Click OK.

-
Right-click the Sheriff Security Rights policy and select Edit.
-
In User Rights Assignment, double-click Deny log through Remote Desktop Services.
-
Click the checkbox for Define these policy settings.
-
Click Add User or Group.
-
Click Browse, enter Sheriff Authenticated Scan and click Check Names.
-
Click OK.
-
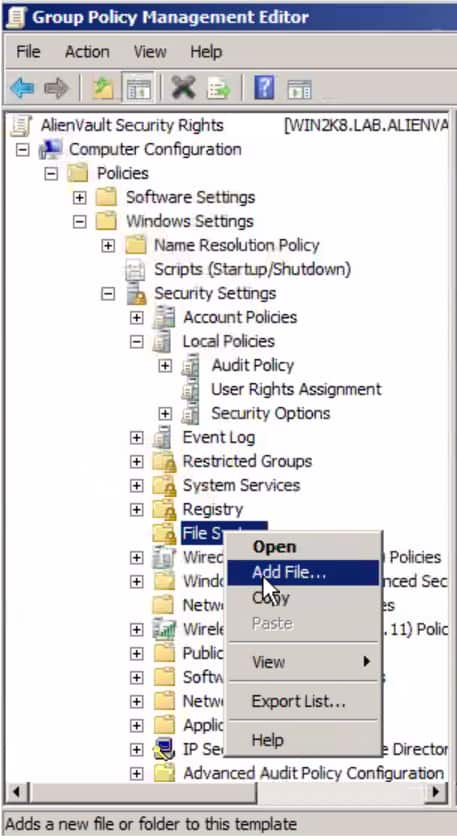
Right-click File Systems and select Add File.

-
Enter
%SystemDrive%. -
Click Add under Group or user names.
-
Enter Sheriff Authenticated Scan.
-
Click OK.
-
Select the authenticated user in the Sheriff Authenticated Scan group.
-
Uncheck any permissions that are marked in the Allowed column, and click Deny for the Write permission.
-
Click OK.

-
In the Object window, select Configure this file or folder then and Propagate inheritable permissions to all subfolders and files and then click OK.

-
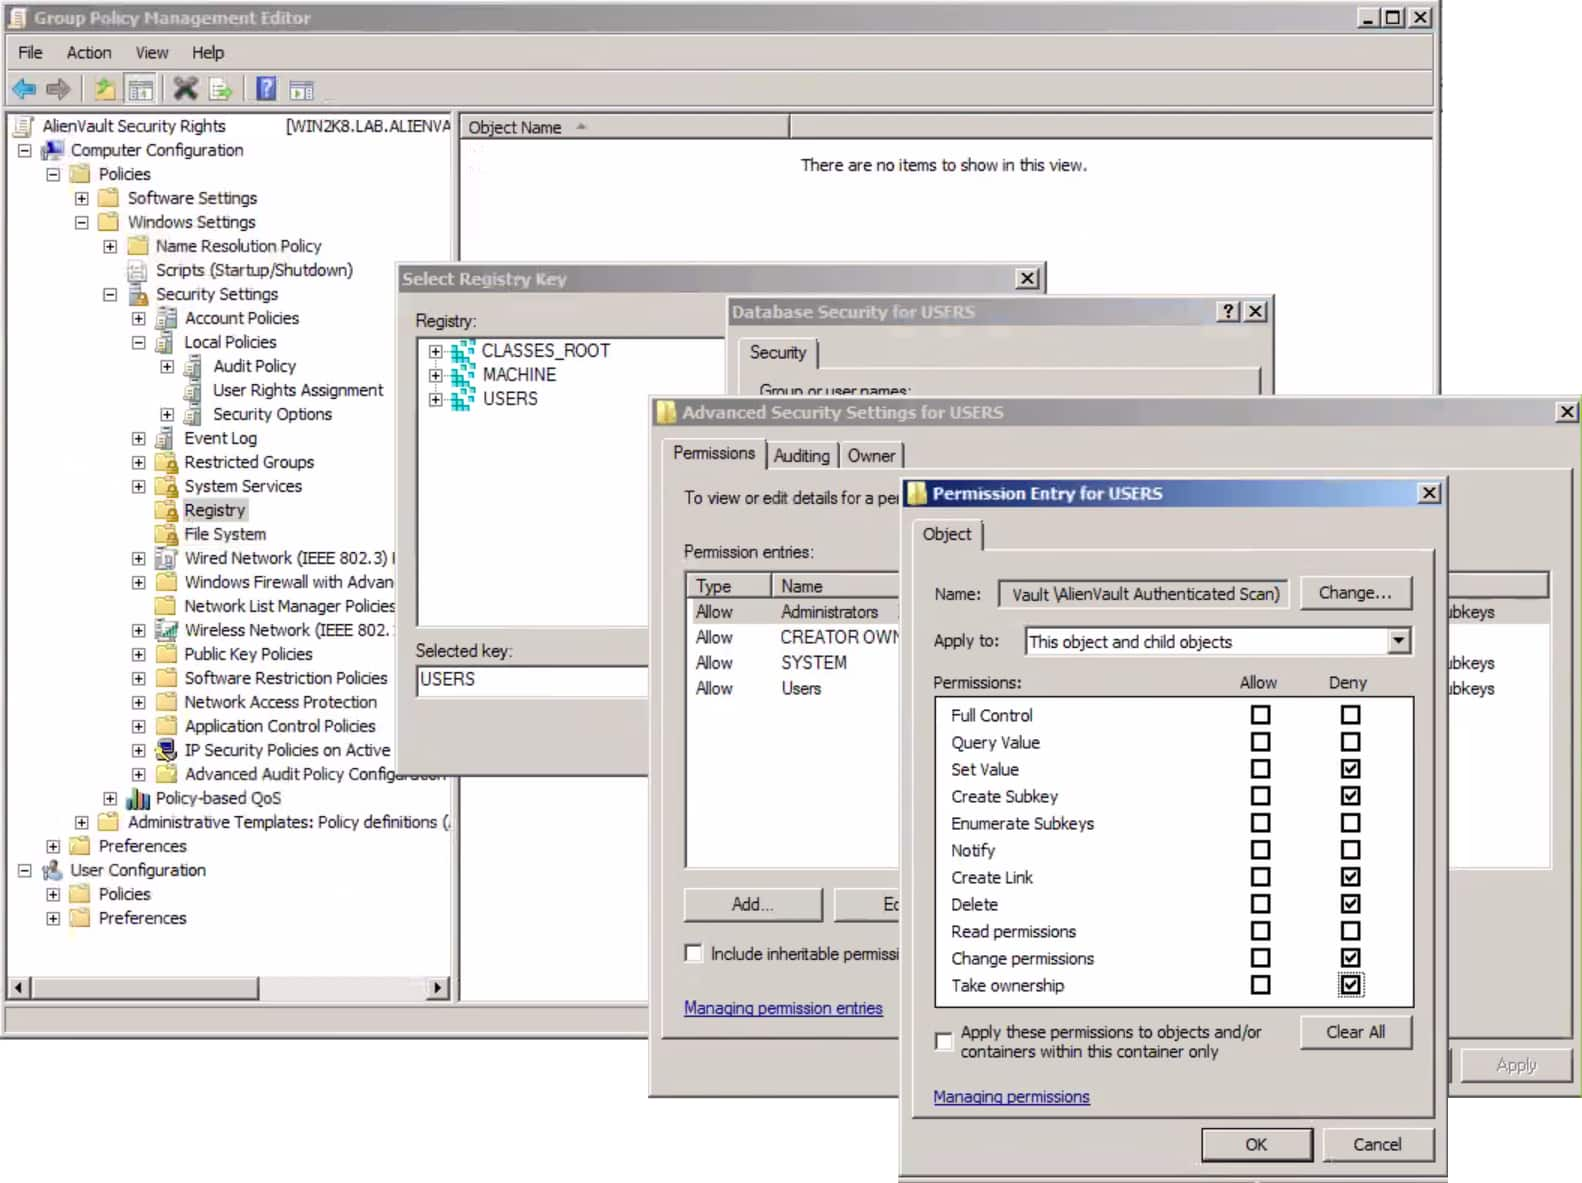
Click Registry and select Add Key.
-
Select Users and click OK.
-
Click Advanced and then click Add.
-
Enter the Sheriff Authenticated Scan group and click OK.
-
In the Permissions Entry Objects window's Apply to field, and select This object and child objects.
-
In the Permissions section below, click the Deny checkboxes for Set Value, Create Subkey, Create Link, Delete, Change Permissions, and Take Ownership. No checkboxes should be set to Allow.
-
Click OK and confirm the changes.

-
Select Configure this key then and Propagate inheritable permissions to all subkeys radio buttons and click OK.
-
Repeat these steps for the Machine and Classes Root Registries as well.
Linux
To perform authenticated scans on Sheriff CSM from a Linux system, the user must have root privileges. The Linux login is performed through SSH, while Sheriff CSM performs the authentication either with a password or an SSH Key stored in Sheriff CSM. The Linux account used for authenticated scans must be able to perform uname commands and read and execute Debian (.deb and .dpkg) or Red Hat (.rpm) files. Public Key Authentication must not be prohibited by the SSH daemon with the linePubkeyAuthentication no.
For more information about creating credentials for authenticated scans in Sheriff CSM, see Creating Credentials for Vulnerability Scans.