Previous Next Sheriff CSM™
Reviewing Alarms as a Group
This task helps you sort alarms in bulk as a group when you have many alarms that are similar. You can always switch to List View if you need more insight into specific alarms. To review alarms in Group View- Go to Analysis > Alarms.
-
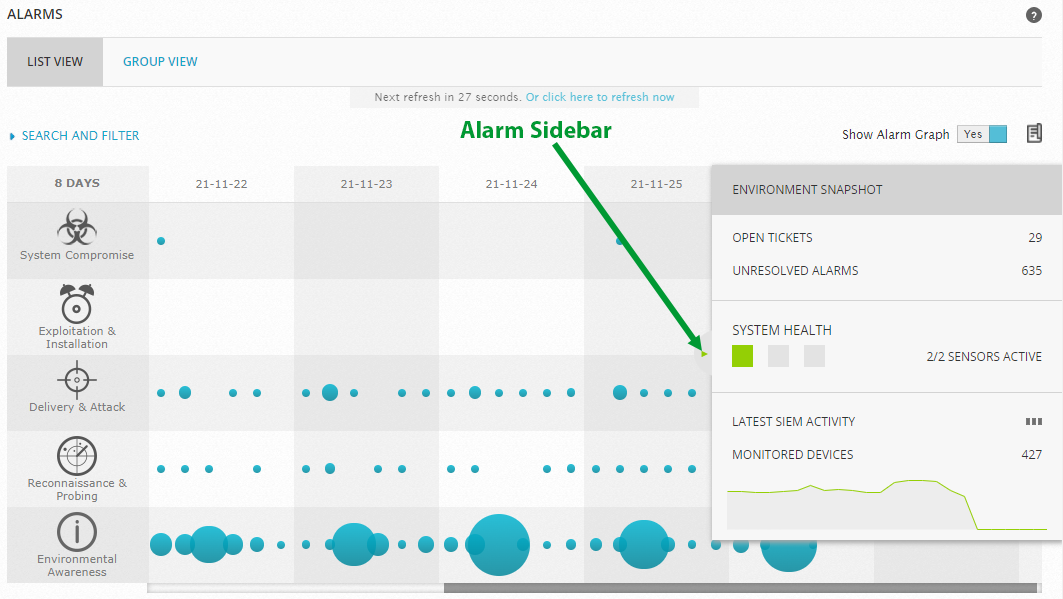
To see the number of unresolved alarms, click the Alarms page sidebar.
This sidebar shows the number of alarms reported in Sheriff CSM. A large number would normally only be present before you have created policies or customized correlation rules to exclude false positives. This may also show that you still need to update vulnerable software on certain, high-value assets.
-
To see how many similar alarms you have, select the Group View tab.
-
Under Search and Filter, select the criteria for the group, for example, alarms of the same category.
Sheriff CSM automatically displays all alarms corresponding to your filtering criteria.
You can also filter for alarms related to a specific Sheriff CSM Sensor (Deputy), a specific source or destination IP, and other useful filtering criteria.
-
Analyze the alarms, paying attention to the following in the order dictated by your incident plan:
- Any alarms based on an Open Threat Exchange (OTX) pulse.
- Any alarms with a source or destination IP, based on OTX IP Reputation data.
- Alarms occurring with the greatest frequency. By analyzing and eliminating such events, whether harmful, relevant, or not, you reduce the number of events that Sheriff CSM or an analyst must process.
- Examine new types of alarms. These indicate changes in network patterns and behavior.
- Look at hosts that seem to be involved in a lot of alarms. This may indicate a vulnerable host or an infection of the host with malicious software.
- Look at hosts that seem to be Identify the group of open alarms on which you want to take action.
Note: If an OTX pulse is creating too much noise and generating too many false positive alarms, you can unsubscribe from the pulse. In that case, you will still receive information about the threat in your pulse activity feed, but no raw data is pulled into Sheriff CSM for correlation and generation of alarms.
-
Identify any groups of alarms you want to investigate further, for example, any alarms with a higher risk than others in the group, such as Delivery and Attack.
-
Go to the Alarms List View and, for example, filter for the alarm intent.
-
After locating the alarm you want to investigate, take ownership of it. Taking ownership tells others on your team that you are actively investigating this, avoiding duplicate efforts.