Previous Next Sheriff CSM™
Replace Disk Drives or Power Supplies
You may need to replace a power supply or hard disk drive on an Sheriff CSM hardware should either one fail. These two components represent the most common cause of hardware failures, and can be replaced if necessary. Sheriff Support must confirm that your appliance needs a new disk drive or power supply before you can receive a replacement. Open a support ticket to report the issue and make your request. See Sheriff Technical Support for information about opening a ticket.Replace Disk Drives
If you need to replace a disk drive for an Sheriff CSM hardware, you can do it while the appliance is powered up. You can determine if an appliance has a failed disk drive by checking for a red-colored LED on the front panel of the appliance or by using the RAID management software. To replace a disk drive-
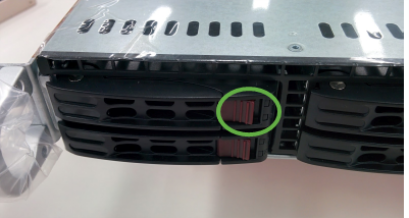
Push in the red-colored switch on the carrier.
-
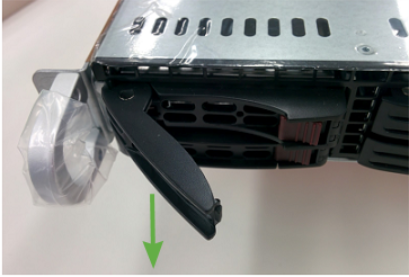
Use the black lever to pull the carrier out of the drive bay.
-
After you remove the disk drive from the carrier, you need to remove four screws.
There are two screws on each side of the carrier.

-
Confirm the replacement is the same size or larger than the failed drive.
-
Remove the defective disk drive from the tray.
-
Insert the new drive with the SATA connections facing the rear of the tray.

- Make sure the screw holes are aligned before hand-tightening the screws.
-
Slide the drive into the bay and press the black lever to lock it.

Replace Power Supplies
If you need to replace a power supply for Sheriff CSM hardware, you can do it while the appliance is powered up. The table below helps you determine the status of the power supplies. 700 Watt Power Supply LEDs| State | Indication |
|---|---|
| Solid green | System is on. |
| Solid amber | System is off and plugged in or 5V standby is on. |
| Blinking amber | Power supply internal temperature has reached 63 degrees Celsius. The power supply will shut down if the temperature reaches 70 degrees Celsius. |
-
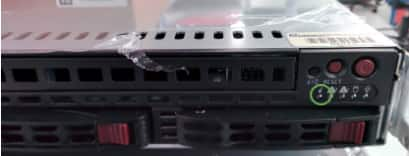
On the front panel of the appliance, look for the illuminated "i."
-
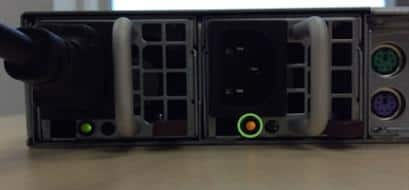
On the back of the appliance, check the power supplies for an amber-colored or un-illuminated LED that indicates a power supply has failed.
-
After you identify the failed power supply, unplug its power cord.
-
Push the red-colored lever to the left and then pull the metal handle to release the power supply.
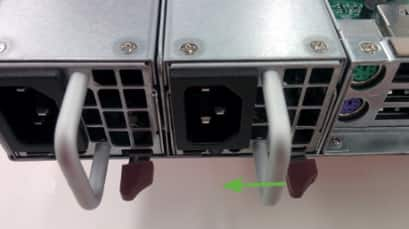
The power supply should release from the bay.
-
Insert the replacement power supply into the bay.
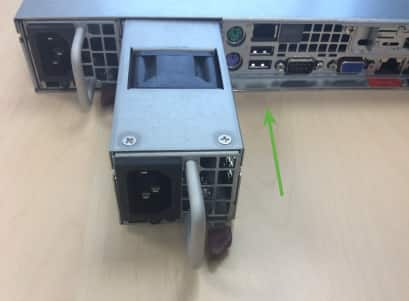
-
Confirm the power supply is locked in place by gently pulling on its metal handle.

-
Plug the power cord into the replacement power supply and make sure that the LEDs are green for both power supplies.
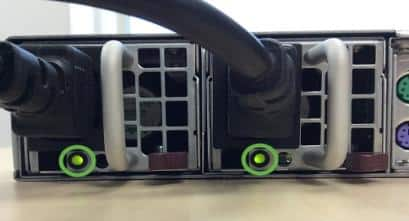
Topic revision: 20 Sep 2021, SheriffCyberSecurity