Previous Next Sheriff CSM™
How to Run Reports
You can find all the Sheriff CSM reports on Reports > All Reports. For field descriptions,

| Fields | Descriptions | |
|---|---|---|
| Report | Name of the report. | |
| Category | Category that the report belongs to. | |
| Settings | Default settings to run the report—on all assets, for the last 30 days, and with the default layout. | |
| Scheduled | Whether the report is scheduled to run in the future or not. | |
| Actions | To delete the report. Not available for built-in reports. | |
| To export the report. | ||
| To copy the report. | ||
| To edit the report. Not available for built-in reports. | ||
| To customize the parameters before running. | ||
| To run the report without any modification. | ||
-
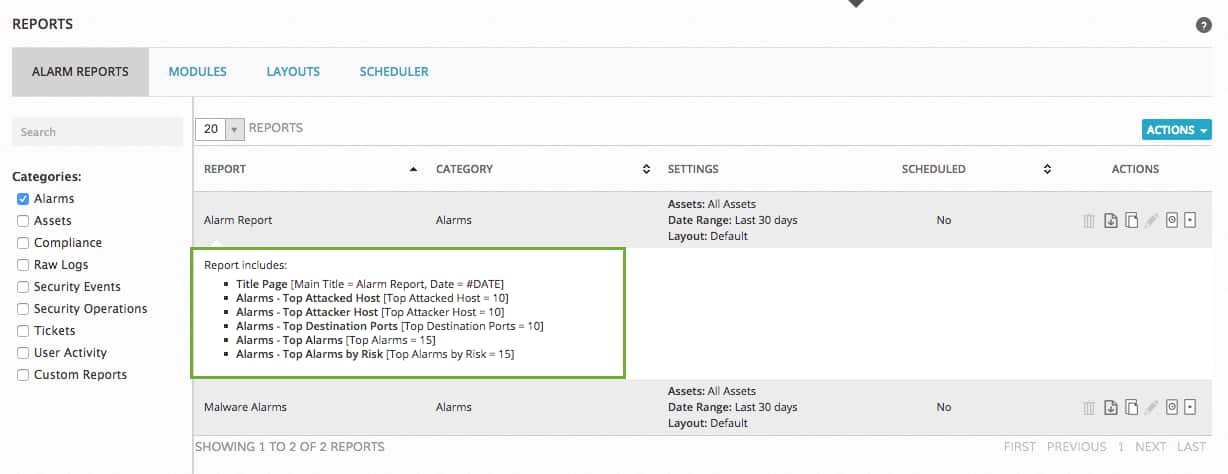
Click the report row.
A list of modules displays below.

-
Select a report.
-
(Optional) Examine the modules that the report includes.
-
Click the Run icon (
 ).
).The report runs on all assets and for the last 30 days. The result displays after the completion.
-
Select a report.
-
(Optional) Examine the modules that the report includes.
-
Click the Custom Run icon (
 ).
). -
In Custom Run, perform one or all of the following:
- Change the date range.
Note: In Sheriff CSM version 5.2 or earlier, the Last x days options exclude the current day. In Sheriff CSM version 5.2.1 or later, these options include the current day.
- Select a different layout. For instructions, see Create Custom Report Layouts.
- Specify an asset or a group of assets.
- Change the date range.
-
Click Run.
The generated report displays after completion.
-
(Optional) To save or distribute the report, click Export.
You can choose PDF or XLSX format, either download the file locally or send it through email.
If choosing Email, type the email address in the box that appears, use semicolon to separate multiple addresses.
-
Click Export.
Note: In order to send reports by email, you need to have configured the mail relay settings in Sheriff CSM. For instructions, see Configure Mail Relay in Sheriff CSM.

-
Go to Reports > All Reports, and then click Scheduler.
-
Click Schedule a Report.
-
In Select Report, click the + sign next to the report name or drag the report to the left column. Alternatively, type the name of the report in the search box to find a specific report.
Note: You can only select one report per scheduler.
-
In File Type, PDF or XLSX.
-
(Optional) In E-mails, enter a list of email addresses, separated by semicolons, for people to receive the report.
-
In Date, select the date range for the report.
-
(Optional) Select a user or entity that can access the report.
-
Optional) If you only want to store the last generated report, disable Save in Repository. Otherwise Sheriff CSM stores all reports generated by the scheduler.
-
Select the frequency as well as the date and time that you want the report to run.
-
(Optional) Select the assets that you want to include in the report.
-
Click Save Scheduler.
-
Go to Reports > All Reports > Scheduler.
-
Click the disk icon (
 ) for the scheduled report.
 - In View PDF Repository, click the PDF icon next to the report.
-
Select the report you want to export.
-
(Optional) Examine the modules that the report includes.
-
Click the download icon (
 ).
). -
Enter a password to encrypt the report, and then click OK.
Note: You will need to enter this password while importing the report.
Your browser downloads the report to your local system or prompts you for the download.
-
Login to the Sheriff CSM web interface and go to Reports > All Reports.
-
From the Actions list at the upper right-hand corner, select Import Report.
-
In Import Report, click Choose File to select the report you want to import.
-
Enter the password used to encrypt the report, click Import.
The report appears as a custom report under Reports > Custom Reports.