Previous Next Sheriff CSM™
Filtering Alarms in List View
Both a high-level overview and a detailed look at individual alarm types, the List View lets you filter alarms by one of two methods:- Using the Alarm Graph to see where you have the most or the highest-risk alarms (Filtering Alarms, Using the Alarm Graph).
- Searching and filtering for alarms using specific criteria (Using Specific Search and Filter Criteria for Alarms).
Filtering Alarms, Using the Alarm Graph
Alarms in the graph appear correlated by intent, based on the Cyber Kill Chain model. Blue bubbles of varying sizes indicate the relative number of alarms generated among your assets on each day within a 31-day period. To expose the Alarm Graph- On the Alarms page, look for the label Show Alarm Graph on the far right of the Search and Filter section.
-
Click No.
This toggles the Alarm Graph to Yes and the Alarm Graph appears.

-
Hover over one of the bubbles to get more details.

Each bubble represents the alarms of a specific intent for a three-hour period of one day in a 31-day cycle. Each exposes the following details:
- Time span in three-hour increments.
- Number of alarms.
- Top five strategies among these alarms, for example, spyware infection or worm infection.
-
Click one of the bubbles.
Now the Alarms list appearing below the graph shows just the alarms of the type and window of time you selected.
You can click on any of the alarms to see the event that triggered it. See Review Security Events.


-
Go to the Show Alarm Graph toggle (shown) and click the Yes default to toggle the setting to No.
The Alarm Graph now no longer displays.
- When you want to see it again, just toggle No to Yes.
Using Specific Search and Filter Criteria for Alarms
You can use the Search and Filter area of the Alarms page to search for specific alarms, based on the following criteria:
- Alarms from a specific Sheriff CSM Sensor (Deputy)
- Alarm name / ID
- Source and destination IP address
- Date range
- Asset Group
- Intent
- Directive ID
- Alarms containing certain event types
- Number of events in the alarm
- Risk level of the alarm
- Alarms exclusively from OTX pulses, or search on the pulse name.
-
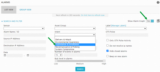
In the Search and Filter section of the Alarm page, select your search criteria and click Search.
Your search results appear in the Alarms List.

-
To see more details, click on one of the alarms (Reviewing Alarms as a List).
Note: Hide closed alarms is selected by default.
