Previous Next Sheriff CSM™
Creating Credentials for Vulnerability Scans
Although optional, we recommend that you use credentials to perform authenticated vulnerability scans. Authenticated scans shouldn't replace network scans, but they use less bandwidth, because they're performed locally, and yield better and more relevant results than unauthenticated scans. They are also more comprehensive and have fewer false positives than unauthenticated scans. For example, authenticated scans check installed software packages, local processes, and services running on the network. Before running authenticated vulnerability scans in Sheriff CSM, you need to create some credentials first. For requirements on these credentials, see System Settings for Authenticated Scans. Sheriff CSM encrypts the credentials using Advanced Encryption Standard (AES) and stores them in the database. The AES algorithm uses Electronic Codebook (ECB) mode and supports a block length of 128 bits. To create a set of credentials-
Go to Environment > Vulnerabilities > Overview, and click Settings.

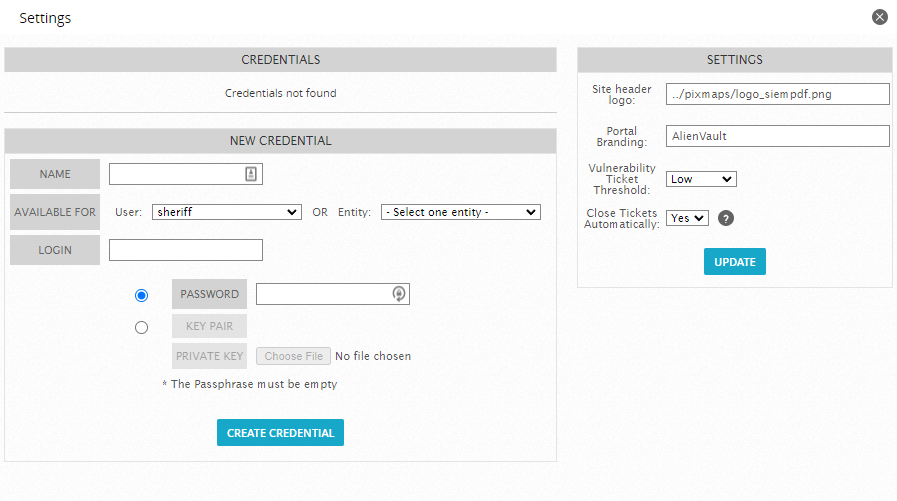
- In the Name field, type the name for the scan or select one of the options that appear on the list when you click within the field.
-
Click to expand the Available for list, and select one of the following:
- A single user with permission to use this credential.
- An entity that allows access by all users who are members of that entity.
-
In the Login field, type the login name for the credential.
Note: To specify a domain, use the syntax "<domain>\<user>", where <domain> is the domain name and <user> is the login name. If you do not specify a domain, Sheriff CSM uses "WORKGROUP\<user>" because it is the default workgroup name on Windows.
-
Authenticate yourself by selecting one of the following:
- (Default) Type the password for the credential in the Password field.
- Select Key Pair, then click Choose File to browse to the location of your private key or key pair file, and click Open
-
Click Create Credential.
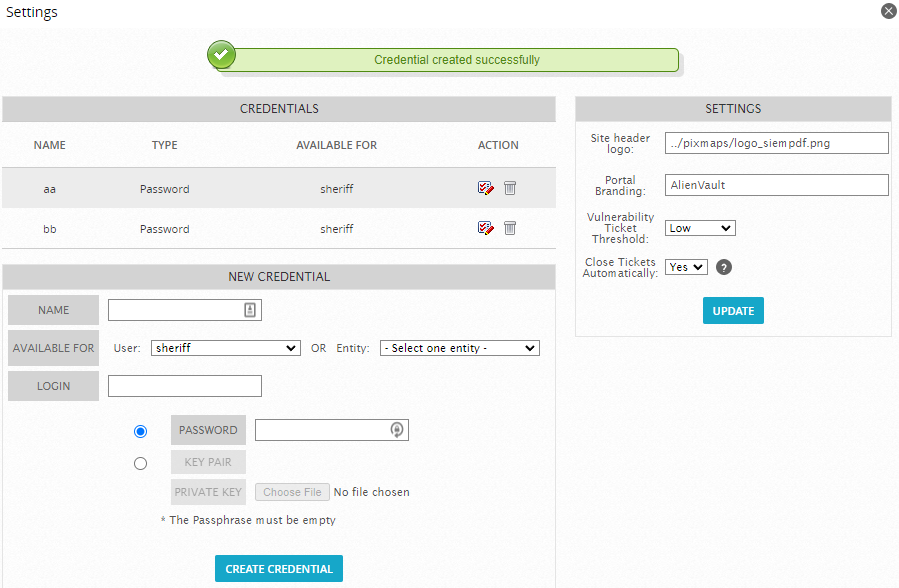
A message appears at the top of the page to confirm that you successfully created the new credential.
The new credential appears under Credential (shown in the following illustration).
-
Click the checkmark and pencil icon (
 ).
). -
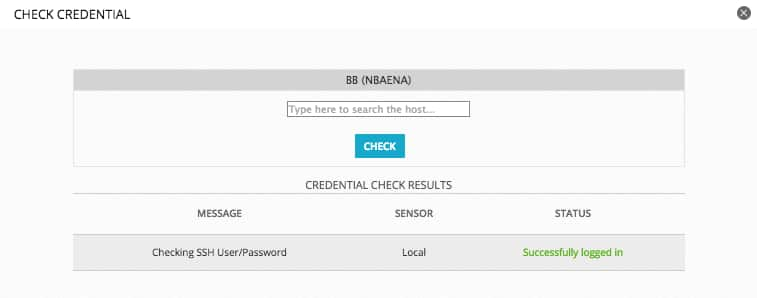
In the popup that appears, click inside of the empty field below the username or entity (shown).
-
Type or select the appropriate IP address, then click Check.
Sheriff CSM displays the message:
Checking...
When the authentication process has completed, the Check Credential popup displays either "Wrong Credentials" or "Successfully logged in" under Status.

-
Click the trash can icon (
 ).
).
Topic revision: 26 Apr 2022, SheriffCyberSecurity