Previous Next Sheriff CSM™
Back Up and Restore Alarms
By default, Sheriff CSM stores alarms in the database until you delete them manually. To save disk space, Sheriff encourages that you delete alarms after they have been investigated or mediated, especially if the alarm is a false positive. You can also configure the alarms to expire after a certain time, then Sheriff CSM will purge the alarms automatically. The recommendation is to store alarms for 90 days for compliance and 30 days for data forensics.Alarm Backup Configuration
To configure alarm expiration:- From the Sheriff CSM web interface, go to Configuration > Administration > Main > Backup.
-
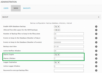
Change Alarms Expire to Yes.
The Alarms Lifetime defaults to 0 (days), which means the alarms never expires.
-
Change Alarms Lifetime to a suitable number based on your environment and your company's requirement. For example, 90 days for compliance or 30 days for data forensics.
- Click Update Configuration

/var/lib/vigilante/backup_alarm. The name of the file reads alarm_restore_yyyy-mm-dd.sql.gz.
Backing Up All the Alarms
To back up all the alarms on Sheriff CSM:-
Connect to the Sheriff Console through SSH and use your credentials to log in.
The Sheriff Setup menu displays.
-
On the Sheriff Setup main menu, select Jailbreak System to gain command line access.
Select Yes when prompted. You will be in the root directory.
-
On the command line, type the following command:
screen
We recommend using the screen session so that you can keep the program running even after you log out.
-
Stop the following services so that they do not interfere with the process:
/etc/init.d/monit stop
/etc/init.d/vigilante-server stop
/etc/init.d/vigilante-agent stop
/etc/init.d/vigilante-framework stop
/etc/init.d/sheriff-api stop
-
Back up the alarms:
mysqldump -p`grep ^pass /etc/vigilante/vigilante_setup.conf | sed 's/pass=//'` --no-autocommit --single-transaction sheriff event extra_data idm_data otx_data backlog_event backlog alarm component_tags tag alarm_ctxs alarm_nets alarm_hosts | pigz > sheriff-alarms-`date +%s`.sql.gz
Adding
`date +%s`to the filename gives it a unique time stamp.
sheriff-alarms-<timestamp>.sql.gz file. Transfer the file to the target system. You can use either an SFTP client on Windows, such as WinSCP; or the SCP protocol on Linux.
Restoring Alarms
You can restore all the alarms using the output file generated from the procedure above(sheriff-alarms-(timestamp>.sql.gz) or one of the daily backup files in /var/lib/vigilante/backup_alarm.
Note: Sheriff recommends that you only restore the relevant alarms to avoid filling up the database.
Before following the procedure below, you should have deployed the SAME version of Sheriff CSM. You should have transferred the backup files to the target system and place them in the root directory.
To restore alarms -
Connect to the Sheriff Console through SSH and use your credentials to log in.
The Sheriff Setup menu displays.
-
On the Sheriff Setup main menu, select Jailbreak System to gain command line access.
Select Yes when prompted. You will be in the root directory.
-
On the command line, type the following command:
screen
We recommend using the screen session so that you can keep the program running even after you log out.
-
Stop the following services so that they do not interfere with the process:
/etc/init.d/monit stop
/etc/init.d/vigilante-server stop
/etc/init.d/vigilante-agent stop
/etc/init.d/vigilante-framework stop
/etc/init.d/sheriff-api stop
-
Restore the alarms:
zcat sheriff-alarms-<timestamp>.sql.gz | vigilante-db
-
Restart all services for changes to apply:
sheriff-reconfig -c -v -d