You are here: Docs>Sheriff Web>UserGuides>SheriffCSMDocumentation>DeploymentGuide>PluginManagement>ConfigureLogForwardingOnCommonlyUsedDataSources>MikroTikRouter (06 Jul 2022, SheriffCyberSecurity)Edit Attach
Up
Previous Next Sheriff CSM™
Previous Next Sheriff CSM™
MikroTik Router
When you configure MikroTik Router to send log data to Sheriff CSM, you can use the MikroTik Router plugin to translate raw log data into normalized events for analysis. The table below provides some basic information for the plugin: Plugin Information| Device | Details |
|---|---|
| Vendor | MikroTik |
| Device Type | Router/switch |
| Connection Type | Syslog |
| Data Source Name | Mikrotik-router |
| Data Source ID | 1859 |
Integrating MikroTik Router
Before you configure the MikroTik Router integration, you must have the IP Address of the Sheriff CSM Sensor (Deputy). To configure MikroTik Router to send Syslog messages to Sheriff CSM-
Open a terminal in the MikroTik Router.
- Apply the following configuration:
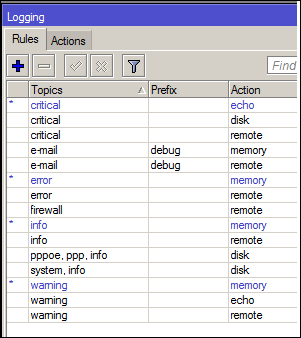
/system logging action
set 0 memory-lines=100
set 1 disk-file-count=30 disk-file-name=<your disk file_name> disk-lines-per-file=500
set 3 remote=<Sheriff CSM IP Address>

# Add topics to be stored in syslog server.zaib
/system logging
add action=remote topics=critical
add action=remote topics=error
add action=remote topics=info
add action=remote topics=warning
- Configure syslog to use the Sheriff CSM IP Address.

Important: To use the RFC 3164 syslog format, you must select BSD Syslog. The Syslog Facility and Syslog Severity settings must also be enabled for the syslog message parsing to function properly.
- Specify remote logging options.


Plugin Enablement
For plugin enablement information, see Enable Plugins.Additional Resources and Troubleshooting
https://wiki.mikrotik.com/wiki/Manual:System/Log#Example:Webproxy_logging For troubleshooting, refer to the vendor documentation: https://wiki.mikrotik.com/wiki/Manual:Troubleshooting_toolsEdit | Attach | Print version | History: r8 < r7 < r6 < r5 | Backlinks | View wiki text | Edit wiki text | More topic actions
Topic revision: r8 - 06 Jul 2022, SheriffCyberSecurity
Copyright 2020 Sheriff Cyber Security, LLC. All rights reserved.