Previous Next Sheriff CSM™
Configure the Sheriff CSM Hardware
You can manage the Sheriff CSM hardware either locally or remotely, through the IPMI or HPE iLO interface. Enabling remote management adds the ability to access the appliance if the operation system is not responsive or does not allow access from the network.Configure the Sheriff CSM Hardware Locally
To manage the Sheriff CSM hardware locally, you must connect a monitor, mouse, and keyboard to the machine. Starting from version 5.4, Sheriff ships Sheriff CSM hardware built on Hewlett Packard Enterprise (HPE) ProLiant Gen9 or Gen10 Servers. All prior versions of Sheriff CSM hardware are built on Supermicro servers. For detailed hardware specifications, see the Sheriff CSM data sheet on the Sheriff website. To connect to the Sheriff CSM hardware locally-
Make sure that the appliance is powered off.
The power switch is located on the opposite side of the appliance from the cable ports.
-
On the rear of the appliance, connect the monitor cable to the VGA port, as applicable.
-
Rear view of Sheriff CSM on Supermicro servers

-
Rear view of Sheriff CSM on HPE ProLiant DL120 Gen9 Servers

-
Rear view of Sheriff CSM on HPE ProLiant DL360 Gen10 Servers with 1Gb interfaces

-
Rear view of Sheriff CSM on HPE ProLiant DL360 Gen10 Servers with 10Gb interfaces

-
-
Connect the keyboard and mouse.
-
Connect one end of an Ethernet cable to the eth0 port, which is reserved for Administrative setup, and the other to the network switch.
- Cable the two power cables to each of the power ports on the left-rear side of the appliance and plug the other ends into a power strip.
-
Power on the appliance and turn on the monitor.
The monitor displays the Sheriff CSM login screen. See Sheriff CSM Initial Setup for details.


Configure the Sheriff CSM Hardware through IPMI
Some Sheriff CSM hardware is built on Supermicro with IPMI utilities. IPMI (Intelligence Platform Management Interface) enables the monitoring and controlling of servers from remote locations. In this section, we cover the following topics:

-
IPMI on Sheriff CSM hardware uses IP address 192.168.200.200 by default, and it does NOT failover to a shared LAN port (eth0 or eth1). This effectively makes it inaccessible to anyone who is not on that internal network.
-
Sheriff recommends that you deploy IPMI on an isolated network segment or virtual LAN (VLAN). In addition, configure the IPMI port to be dedicated. See Configuring a VLAN for IPMI Access.
-
If the IPMI port must be accessed outside of the network security perimeter, set up a VPN server to provide that access.
- Power on Sheriff CSM.
-
During startup, press and continuously hold Delete on the keyboard.
The BIOS SETUP UTILITY screen appears on the monitor.
-
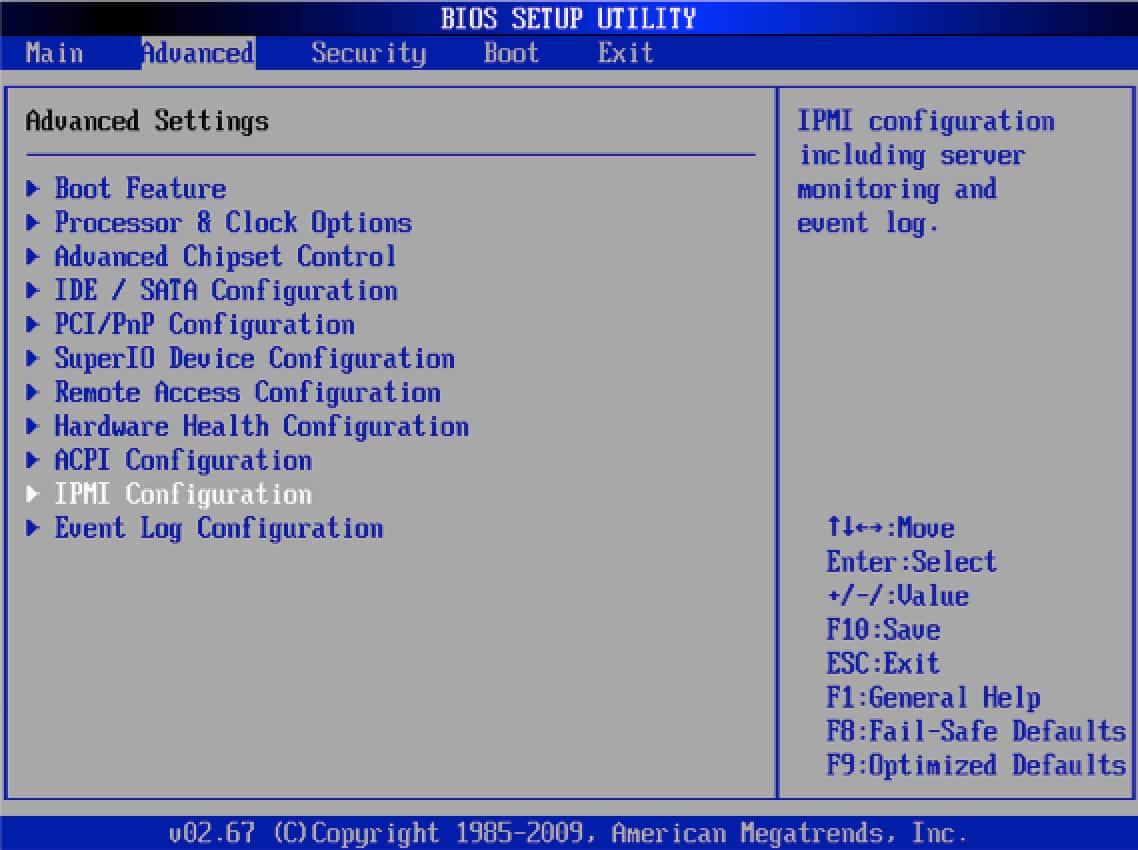
Use Tab or the Up/Down and Right/Left Arrow keys to navigate to the Advanced tab.
The Advanced Settings panel appears.

-
Choose IPMI Configuration and press Enter.
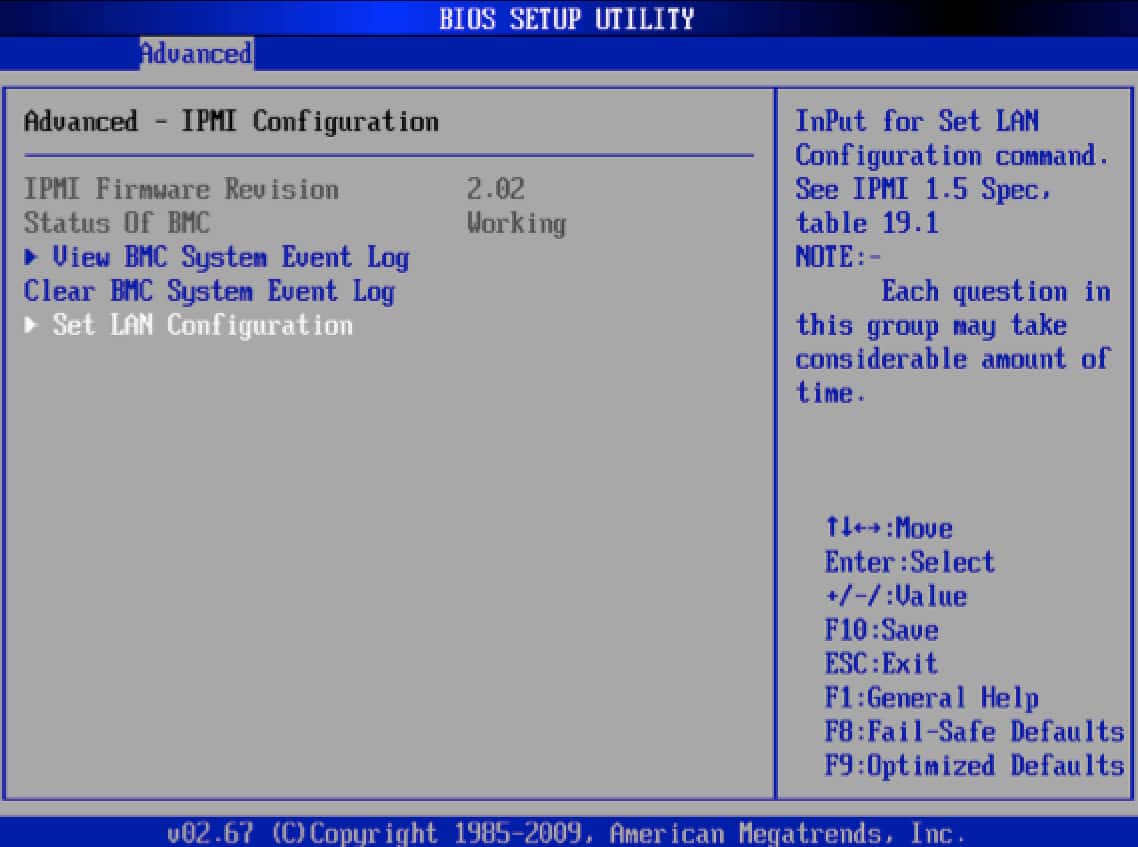
The Advanced - IPMI Configuration panel appears.

-
Choose Set LAN Configuration and press Enter.
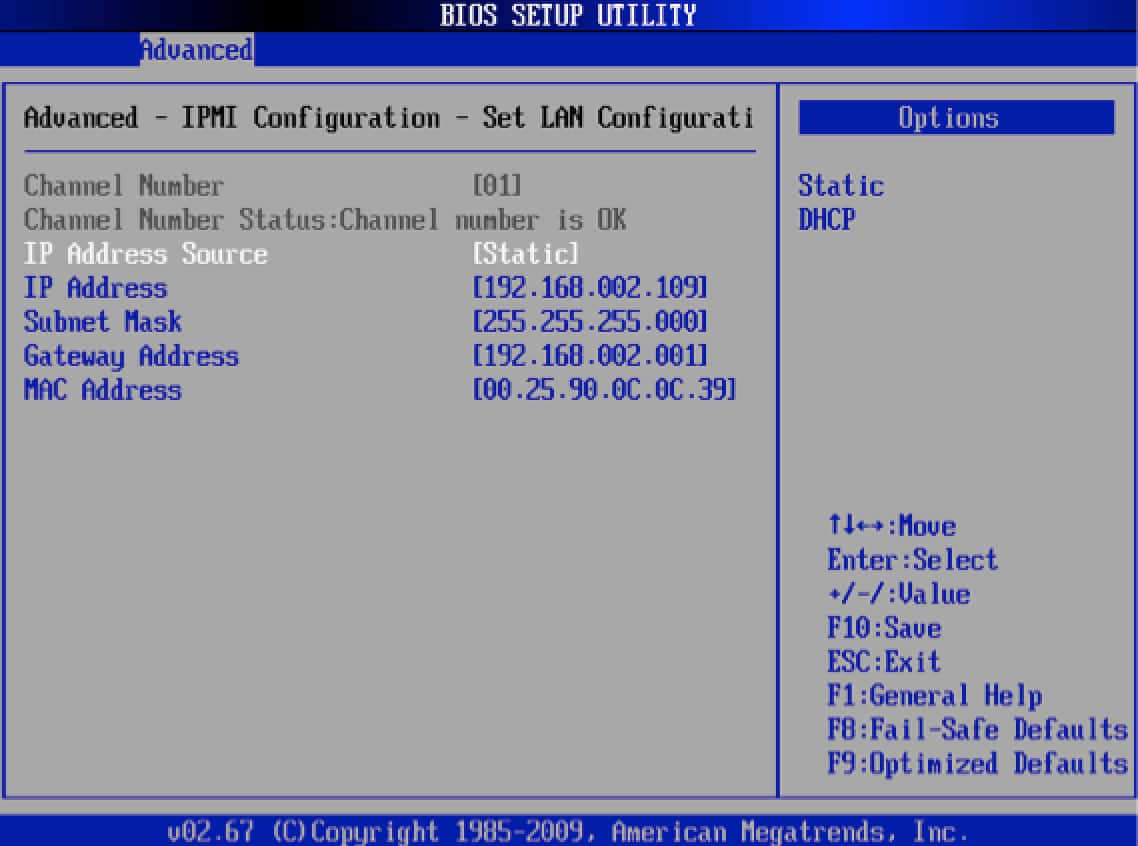
The Advanced - IPMI Configuration - Set LAN Configuration panel appears.

-
Choose a method of assigning an IP address to the machine:
- If you have a DHCP server in the same network as the Sheriff CSM hardware, use the Arrow keys to select IP Address Source, and then use plus (+) or minus
(-) to change IP Address Source to DHCP. - If you do not have a DHCP Server, use the arrow keys to select Static.
- If you have a DHCP server in the same network as the Sheriff CSM hardware, use the Arrow keys to select IP Address Source, and then use plus (+) or minus
-
(Static IP address users only) Use the Arrow keys to access the IP Address, Subnet Mask, and Gateway Address fields and type the appropriate values in each for your device.
Note: Each machine comes with a default IP address; you may either use this IP address or configure a new one.
-
Save the changes by pressing F10, and then press ESC to exit the BIOS SETUP UTILITY.
- You must restart the machine for your changes to take effect.
- Power on the machine.
-
During startup, press and continuously hold Delete on the keyboard.
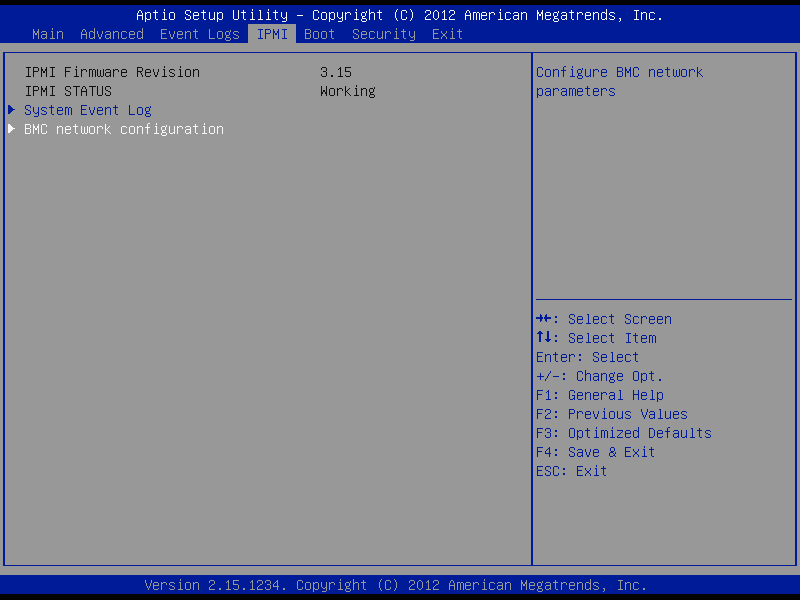
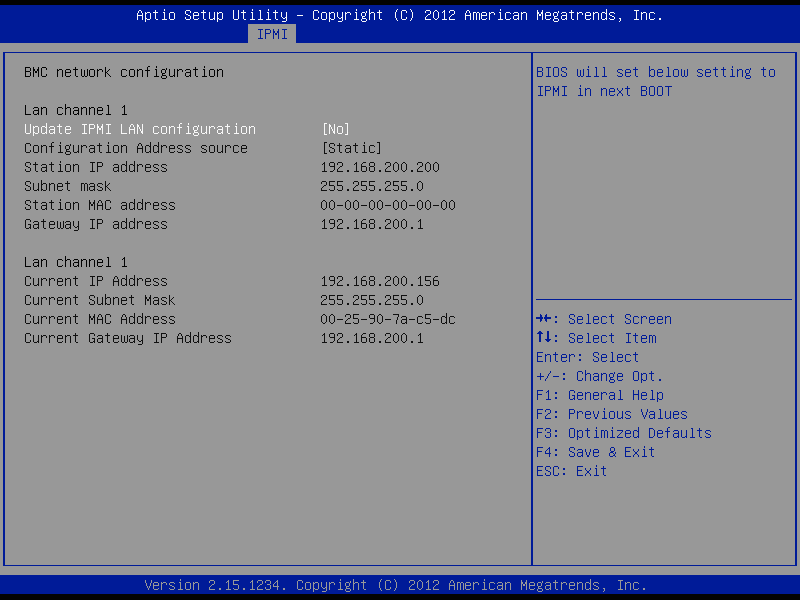
The Aptio Setup Utility appears on the monitor.
-
Using Tab or Arrow, select the IPMI tab.

- Select BMC network configuration and press Enter.
-
Use Down Arrow to select Update IPMI LAN configuration and press Enter.

- Use Tab or Right Arrow to go to the column labeled [No]; toggle it to [Yes] by using plus (+) or minus (-) and press Enter.
-
Choose a method of assigning an IP address to the machine:
-
If you have a DHCP server in the same network as Sheriff CSM Remote Sensor:
- Use Tab to go to Configuration IP Address source, then to Static in the right-hand column of that row.
- Toggle Static to DHCP, using plus (+) or minus (-), and press Enter.
-
If you do not have a DHCP Server, use Tab or Arrow to go to Static; press Enter.
-
- (Static IP address users only) Use Tab to access the Station IP address, subnet mask, and gateway IP address fields, and type the values applicable to your device in each; press Enter.
Note: Each machine comes with a default IP address; you may either use this IP address or configure a new one.
You must restart the machine for your changes to take effect.
-
Open a browser on the computer that can access Sheriff CSM and type the IPMI IP address assigned in the configuration step.
After a connection is made, the Supermicro Login screen appears.
-
Type the default factory username "ADMIN" and password "4L13NV4ULT_0", then click Login.
The main IPMI screen appears.
-
After you have successfully logged in, change the default password for security purposes.
You must then log in with the new password.
-
After logging in again, enable display of the remote Sheriff CSM console and configure redirection:
- On the top menu bar, click Remote Control.
- In the navigation pane at left, select Console Redirection.
- On the Console Redirection screen, click Launch Console .
Note: If the browser blocks it, click the top of the menu bar and select Download File. Then open it from your Downloads folder.
-
When you receive the Java prompt asking whether you want to run the application, click Run .
Note: If you receive a warning that the application is untrusted and asking if you want to make an exception, click Continue.
-
Log into the machine through the browser and enter the IPMI IP address you previously configured.
-
Go to Configuration > Network.
-
Within the VLAN section of the page, click enable.
- In the VLAN ID field, type a value between 1 and 4095 to identify the VLAN.
-
(Optional) In the LAN interface list, select Dedicate.
By selecting Dedicate, you configure IPMI to connect over the IPMI port at all times. Otherwise, it fails over automatically to the two shared LAN ports (eth0 and eth1).
-
Click Save.
| Sheriff CSM Hardware | Motherboard Model | IPMI Firmware File |
|---|---|---|
| Sheriff CSM All-in-One Sheriff CSM Standard Server Sheriff CSM Standard Sensor 6 x 1GB Sheriff CSM Standard Sensor 2 x 10GB Sheriff CSM Enterprise Server Sheriff CSM Server DB Sheriff CSM Enterprise Sensor 6 x 1GB Sheriff CSM Enterprise Sensor 2 x 10GB | X8DTU-6F+ | SMT_326.zip |
| Sheriff CSM Remote Sensor | X9SCL-F X10SLH-F | SMT_X9_352.zip REDFISH_X10_381_unsigned.zip |
- Open a browser and type the IPMI IP address of your Sheriff CSM in the navigation bar.
-
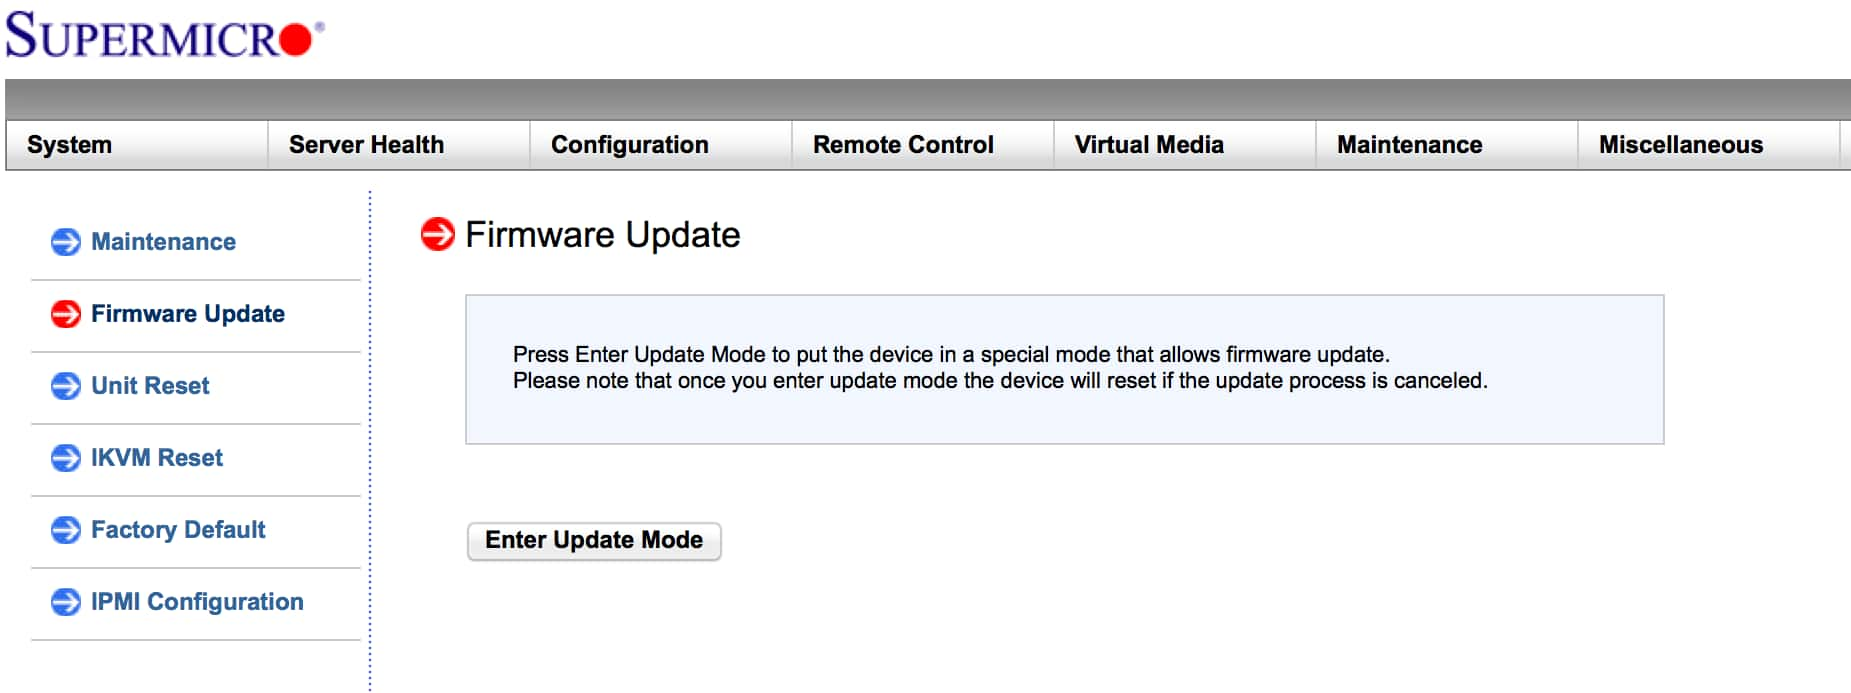
Log in, and then click Maintenance > Firmware Update.
The firmware update displays a message about how the update mode affects the device.

Important: After Sheriff CSM is in the firmware update mode, the update process resets the IPMI device, even if you cancel the update.
-
Click Enter Update Mode and then OK.
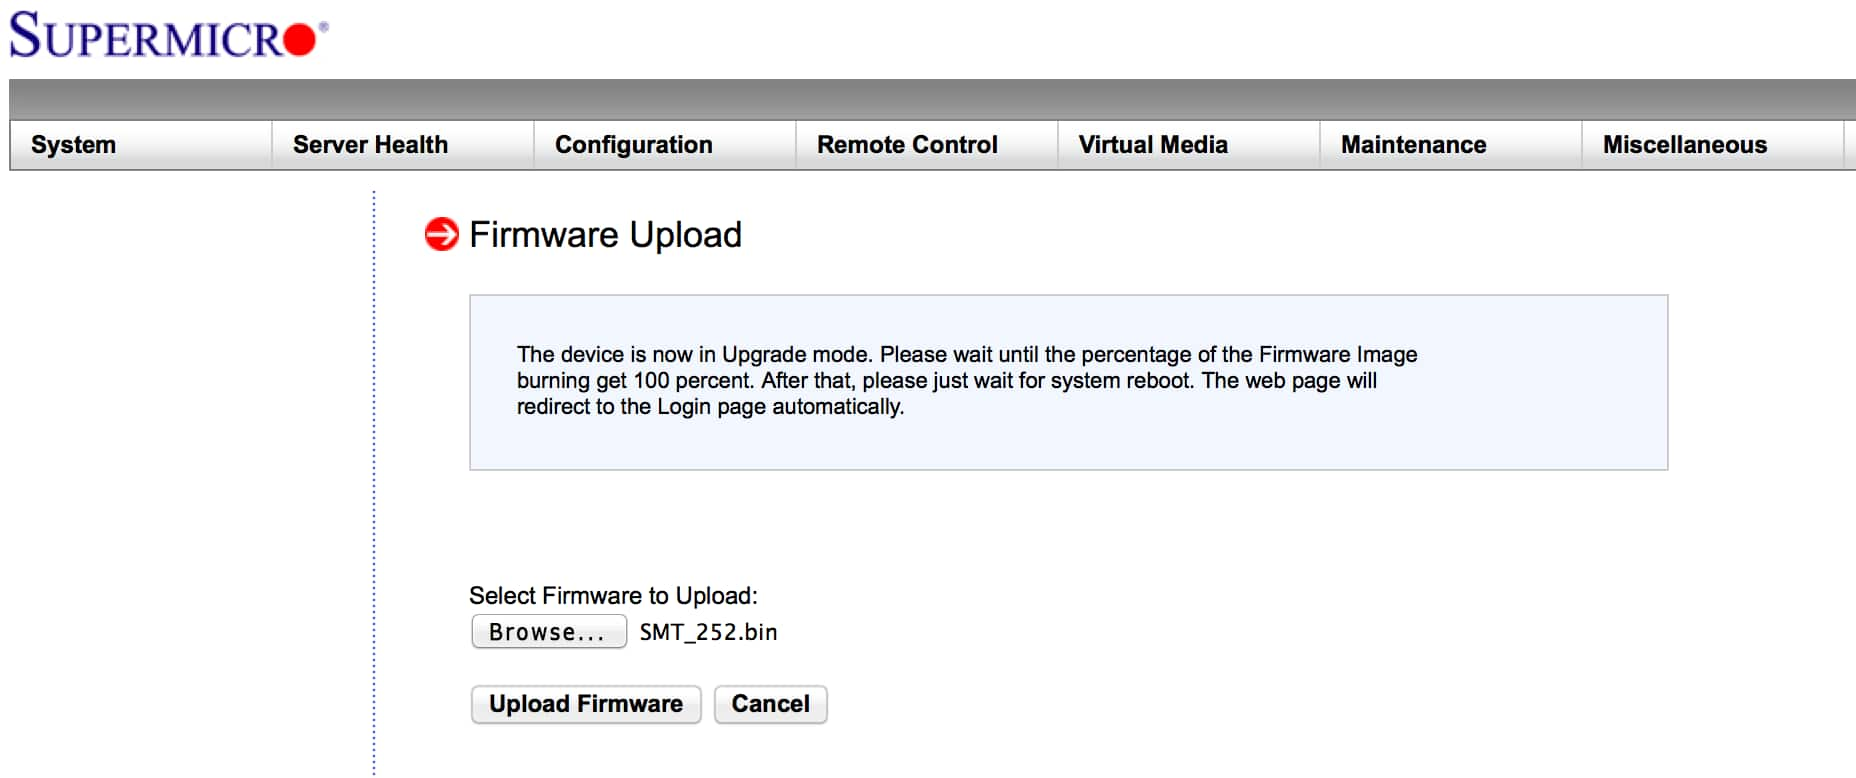
The page changes from Firmware Update to Firmware Upload.
-
Click Browse to choose the firmware file. Make sure that the firmware version is correct before proceeding.

- Click Upload Firmware.
-
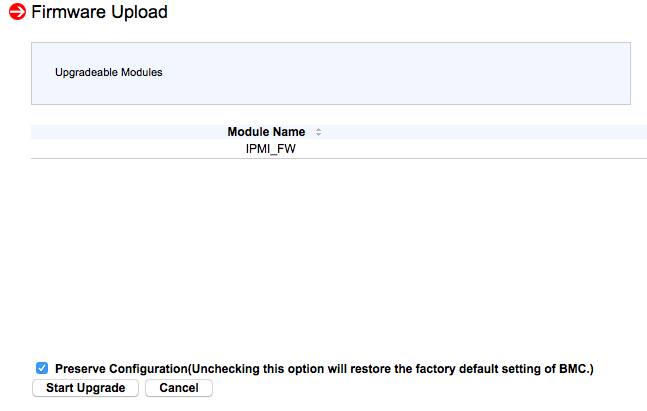
Select Preserve Configuration on the following page, so that the system does not change your configuration during reboot.

-
Click Start Upgrade.
The update process displays a message showing what percentage of the upload has completed.

Warning: Do not interrupt the process. After the upgrade completes, the device will automatically reboot, and you will need to log in again.
- Log in to the system when prompted.
-
Confirm that the firmware has upgraded to the desired version.
-
Click Configuration > Date and Time to update the date and time.

Configure the Sheriff CSM Hardware through HPE iLO
Starting from version 5.4, Sheriff ships Sheriff CSM hardware built on Hewlett Packard Enterprise (HPE) ProLiant Gen9 Servers. Integrated Lights-Out (iLO) is a remote server management processor embedded on the system boards of these servers. HPE iLO enables the monitoring and controlling of servers from remote locations. For security concerns, the Sheriff CSM hardware provided by HPE has iLO disabled by default. You need to enable HPE iLO from the BIOS before you can use it. And should you choose to do it, Sheriff recommends that you restrict access to HPE iLO by configuring a secure virtual LAN (VLAN), and make sure that the VLAN is connected to a secure network. In this section, we discuss the following topics:-
Connect an Ethernet cable to Sheriff CSM through the HPE iLO management port.
-
Connect Sheriff CSM to a power outlet.
-
Make sure you can reach Sheriff CSM over the network from the machine you are on.
-
Install the Java version recommended by HPE on your machine. See the vendor website for up-to-date information.
-
If not using DHCP, acquire the IP address you want to assign to HPE iLO.
The Sheriff CSM hardware provided by HPE has iLO disabled by default. You need to enable HPE iLO from the BIOS before you can use it.
To enable HPE iLO-
Power on or restart Sheriff CSM.
-
Press the F9 key, when prompted, to enter System Utilities.
-
Select System Configuration and then iLO 4 Configuration Utility.
-
Select Setting Options and then change iLO 4 Functionality to "Enabled".
-
Press F10 to save your changes.
-
Restart the server.
The HPE iLO on the Sheriff CSM hardware is pre-configured to obtain the IP address from a DHCP server. If you want to use a static IP address instead, you have to change the configuration from the system BIOS. To manually assign an IP address to HPE iLO
-
Power on or restart Sheriff CSM.
-
Press the F9 key, when prompted, to enter System Utilities.
-
Select System Configuration and then iLO 4 Configuration Utility.
-
Select Network Options:
- Change DHCP Enable to "Off".
- Enter IP Address, Subnet Mask, and Gateway IP Address based on your network setting.
-
Press
F10to save your changes. -
Restart the server.
You can use the HPE iLO web interface to manage iLO. For browser support, see section 12 in the HPE iLO 4 User Guide.
To access the HPE iLO web interface-
Open a web browser and type the IP address assigned to HPE iLO.
The IP address is displayed at the top right corner of the console during a system Power-On Self-Test (POST).
-
Enter the user name and password shown on the sticker label of the appliance.
Each Sheriff CSM appliance includes a sticker label from the manufacturer, where you can see the HPE iLO's default settings, including the serial number, user name, DNS name, and password.
-
Click Log In.
-
Log in to the HPE iLO web UI.
-
Go to Network > Shared Network Port.
- On the General tab, click Use Shared Network Port and leave the default selections for NIC and Port unchanged.
-
To use a VLAN, click Enable VLAN.
Note: According to the HPE iLO 4 User Guide, when the Shared Network Port is active and VLAN is enabled, the iLO Shared Network Port becomes part of a VLAN. All network devices with different VLAN tags will appear to be on separate LANs, even if they are physically connected to the same LAN.
-
In the VLAN Tag field, type a value between 1 and 4094 to identify the VLAN.
All VLANs must have a VLAN ID, and all network devices that you want to communicate with each other must have the same VLAN tag.
-
Click Submit.
The Sheriff CSM hardware provided by HPE has iLO disabled by default. You need to enable HPE iLO from the BIOS before you can use it. Should you decide to disable it later on, you can do so from the BIOS again.
To disable HPE iLO-
Power on or restart Sheriff CSM.
-
Press the F9 key, when prompted, to enter System Utilities.
-
Select System Configuration and then iLO 4 Configuration Utility.
-
Select Setting Options and then change iLO 4 Functionality to "Disabled".
-
Press F10 to save your changes.
-
Restart the server.
Sheriff recommends that you keep the HPE iLO firmware up to date. See the table below for the HPE iLO firmware versions on Sheriff CSM.
HPE iLO firmware versions on Sheriff CSM| HPE iLO Firmware Version | Sheriff CSM Hardware |
|---|---|
| HPE DL 120 Gen9 HPE DL 360 Gen10 | Sheriff CSM All-in-One Sheriff CSM Standard Server Sheriff CSM Standard Sensor 6 x 1GB Sheriff CSM Standard Sensor 2 x 10GB Sheriff CSM Enterprise Server Sheriff CSM Server DB Sheriff CSM Enterprise Sensor 6 x 1GB Sheriff CSM Enterprise Sensor 2 x 10GB |
| HPE DL 20 Gen9 | Sheriff CSM Remote Sensor |
-
Download the HPE iLO firmware image file. See "Obtaining the iLO firmware image file" in the HPE iLO 4 User Guide.
-
Update the firmware from the HPE iLO web interface. See "Updating iLO or server firmware by using the iLO web interface" in the same HPE iLO 4 User Guide.
Topic revision: 08 Apr 2022, SheriffCyberSecurity